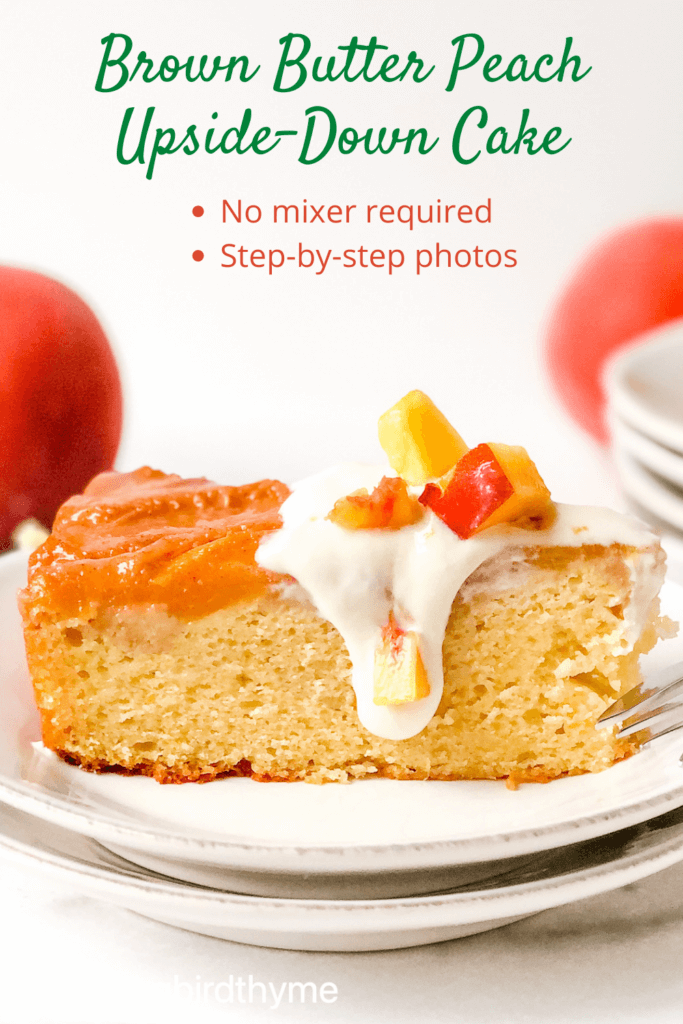
What could be better in the Summertime than Fresh Peach Upside Down Cake made with Brown Butter? Soft vanilla cake with juicy, tangy, caramel-y, sweet peaches! No mixer needed!
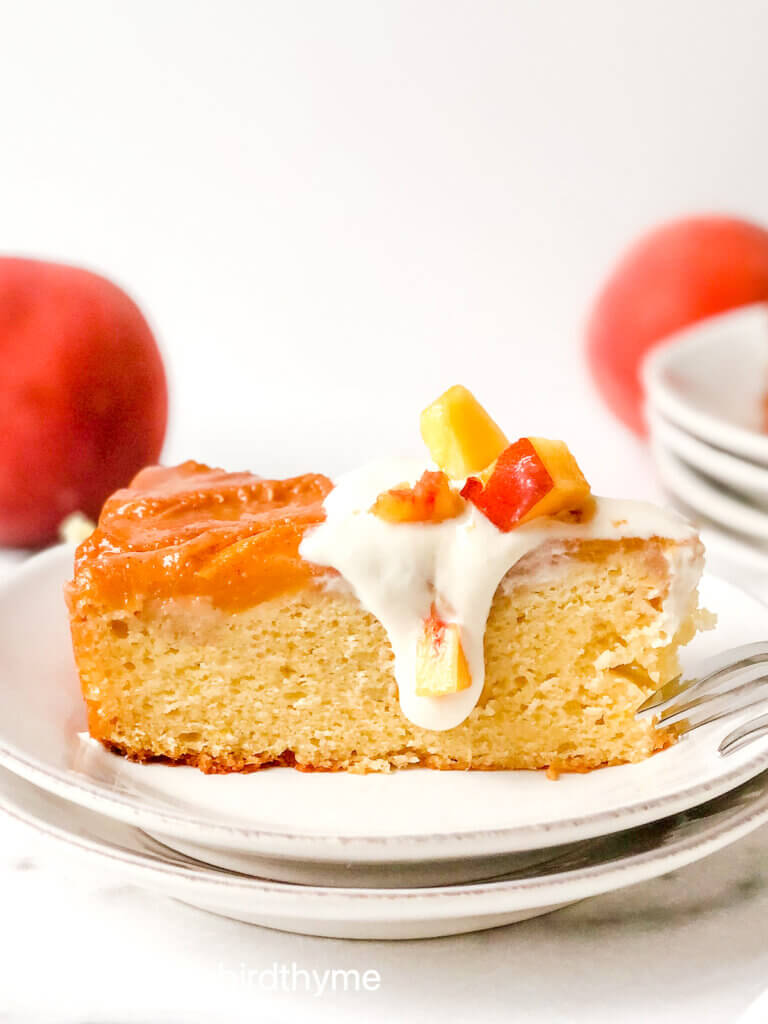
There’s a reason that we describe situations as “just peachy”, or someone we love as “They’re a peach!” right? Because peaches themselves are just that awesome! Sweet, tangy, juicy – what’s not to love? Fresh, frozen, dried, canned. Truly, what’s not to love? So when it’s peach season, I try to make the most of it. And, this Brown Butter Peach Upside Down Cake, for me, is THE cake of the season! I’ve amped up the cake’s flavor by using Brown Butter – an extra step that gives the cake a rich, nutty flavor. Also, the cake is a Sour Cream Cake, to complement the tanginess of the peaches, and give it a pleasing, tender, poundcake-like texture. And, best of all, no mixer is required – just mix the dry ingredients and the wet ingredients separately, then combine.
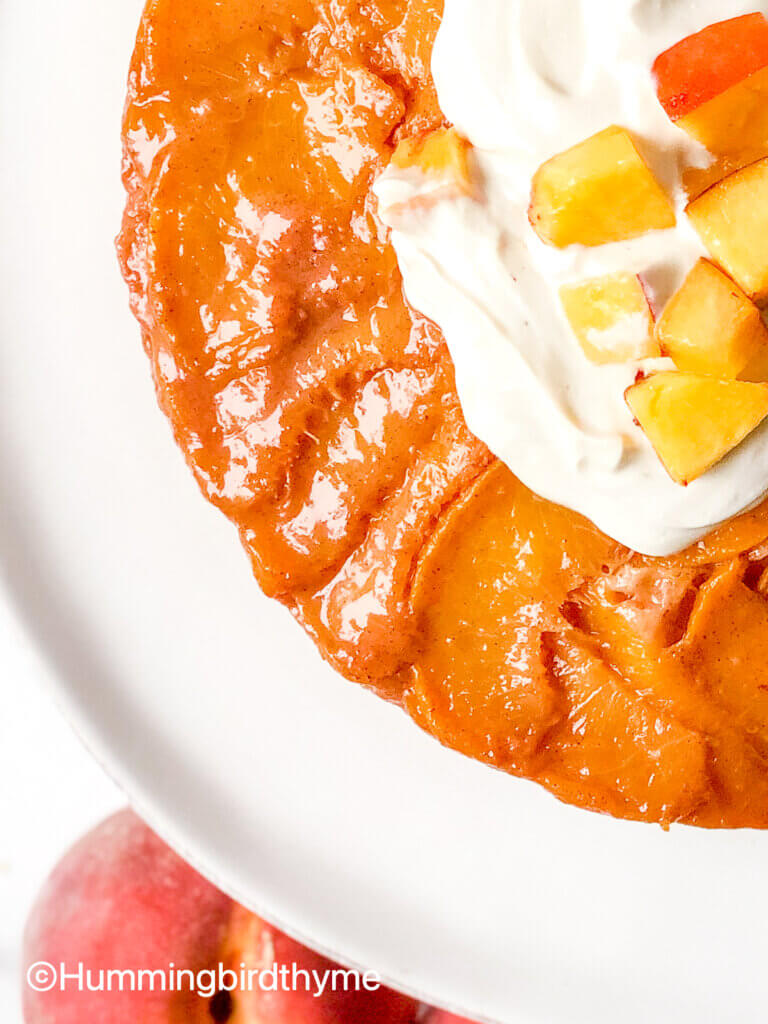
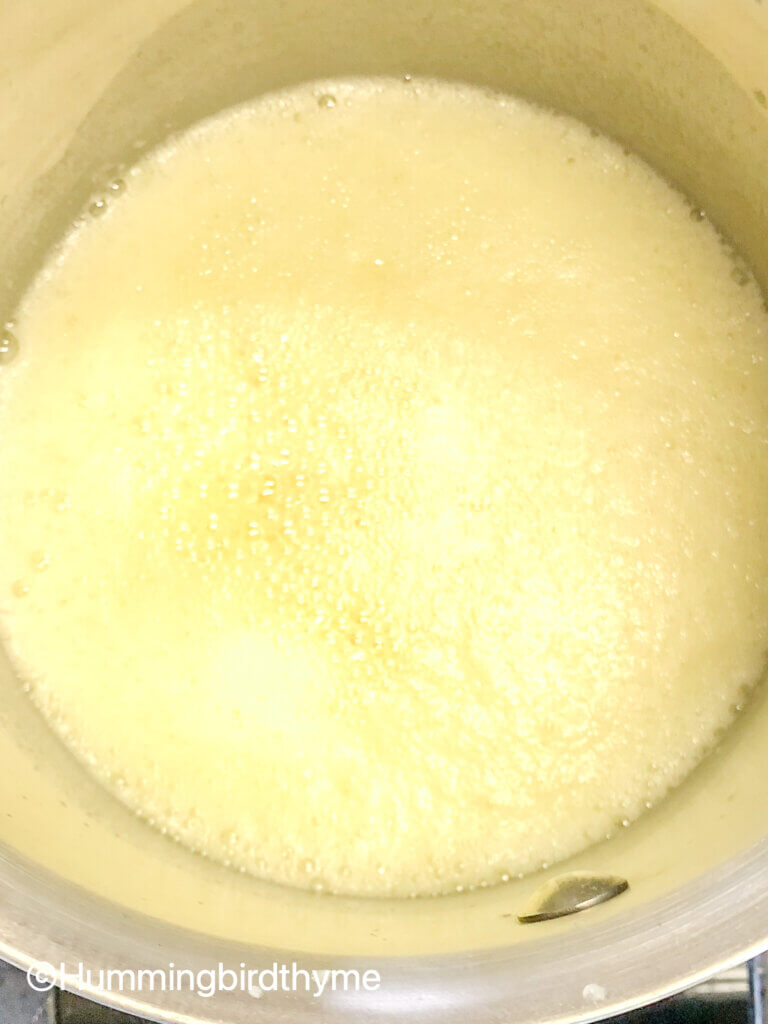
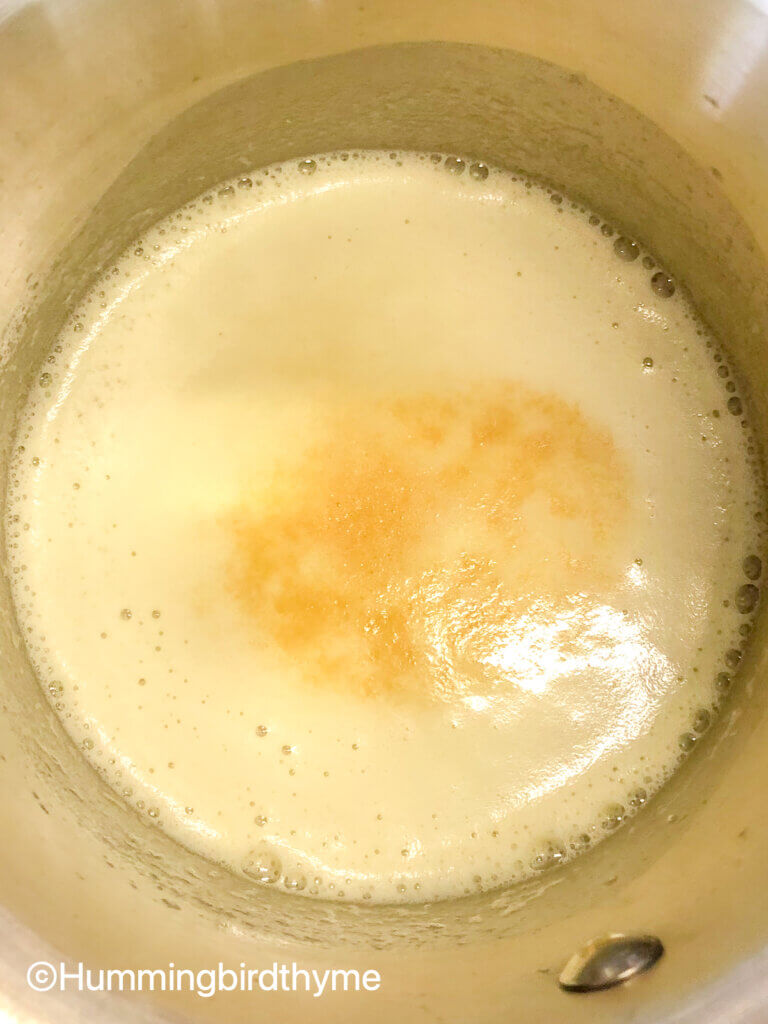
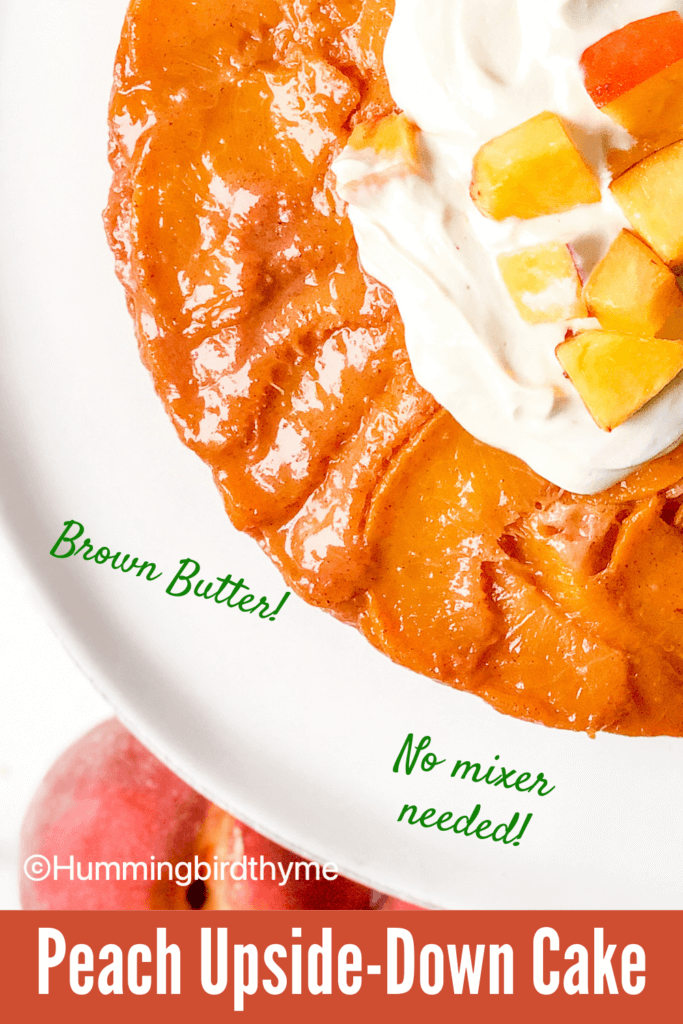
The only extra step is to make the brown butter. Now, if you’ve never made your own brown butter, it’s not that difficult. Truly. A few minutes in a pan, over some heat. You’ll need to watch it the whole time, because, while brown butter is awesome, burnt butter is definitely a tragedy. I’ve included some photos below of what the process should look like at key points. You could use softened butter for sure, but brown butter gives the cake an extra richness and nuttiness you’ll definitely want over and over. And I topped my cake with a tangy/sweet sour cream sauce made with just sour cream and brown sugar. You could use whipped cream, but I liked the not-as-sweet sour cream topping.

I can’t tell you how quick this cake disappeared in my house. Although I did demand request we eat some the day I baked it, and some the next day, just for comparison. As often happens, the “second-day-cake” had better flavor and texture in comparison to the first-day cake. So, that’s my recommendation for sure! Bake it the day before you want to serve it. I know the waiting is the hardest part, but you’ll be rewarded. Promise!
So, are you patient enough to wait for the second day? Or, will you test it, like we did? If you do, let me know – are you a “day it’s baked” person, or a “second-day cake” eater?
Enjoy!
For other delicious peach recipes, check out:
Peach Snickerdoodle No-Churn Ice Cream
Super Moist Peach Lime Pound Cake
How to Make Brown Butter Upside Down Cake:
As an Amazon Affiliate, I may earn a small commission if you were purchase products by clicking on links on this page. Be assured, this is at NO EXTRA COST to you, but it helps offset costs of this blog.
Some things you might need to make this cake recipe:
- A large and a medium bowl – This shape of bowl is my favorite!
- Silicone Spatula
- Whisk – I always love an OXO! – they last and are easy to use!
- 9″ pan – You’ll love a USA Pan!
- Cakestand – so many to choose from!

Step-by-Step Instructions for Peach Upside Down Cake Recipe:

1. Butter Foams Foam begins to brown Pour into heatproof container 2. Prepared Pan 3. Boiled peaches = Easy peel! 4. Line prepared pan with peaches, top with butter mixture
Brown the Butter and Prepare the Peach layer
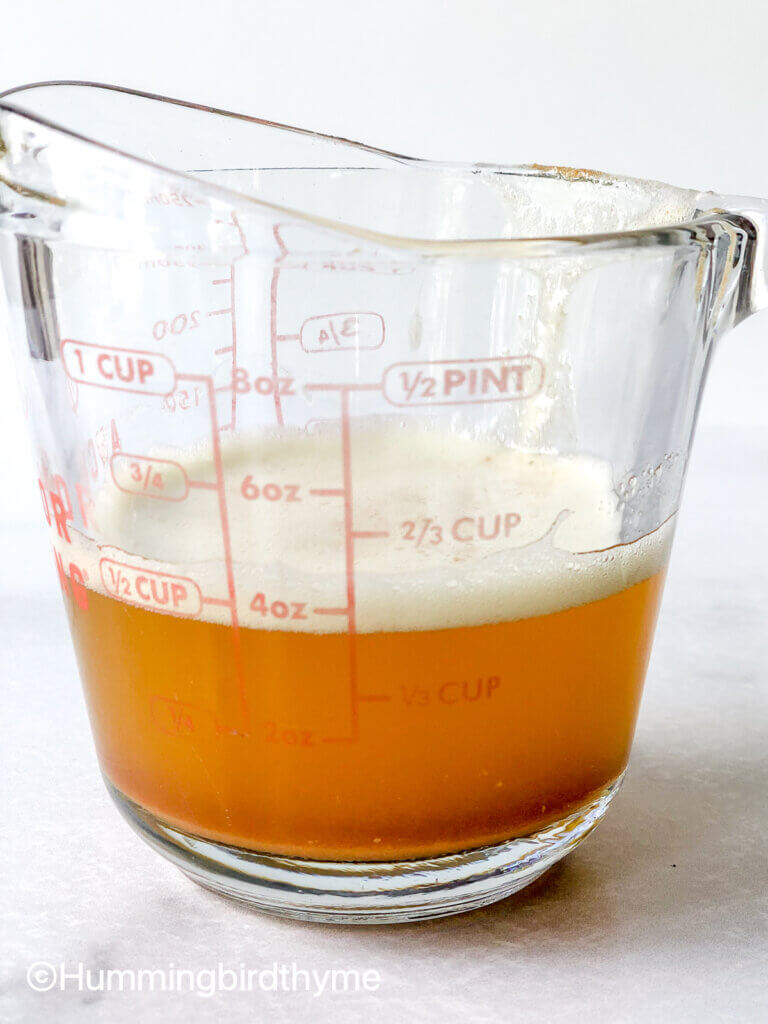
- Make the Brown butter – This is a simple way to amp up the the rich and nutty flavors in butter. I use regular (salted) butter. You just need to keep an eye on it while it browns, and be ready to remove it from the heat once you see the brown bits of milk solids form, then move to the bottom of the pan. At medium heat, the butter will melt, begin to spatter, then foam quite substantially. You should swirl or stir it every minute or so everything cooks evenly. When the foam begins to brown it’s just about ready. You’ll be able to see browned bits of milk solids move to the bottom of the pan. This is the moment to remove it from the heat. I keep a Pyrex measuring cup nearby and pour it into that when it’s done.
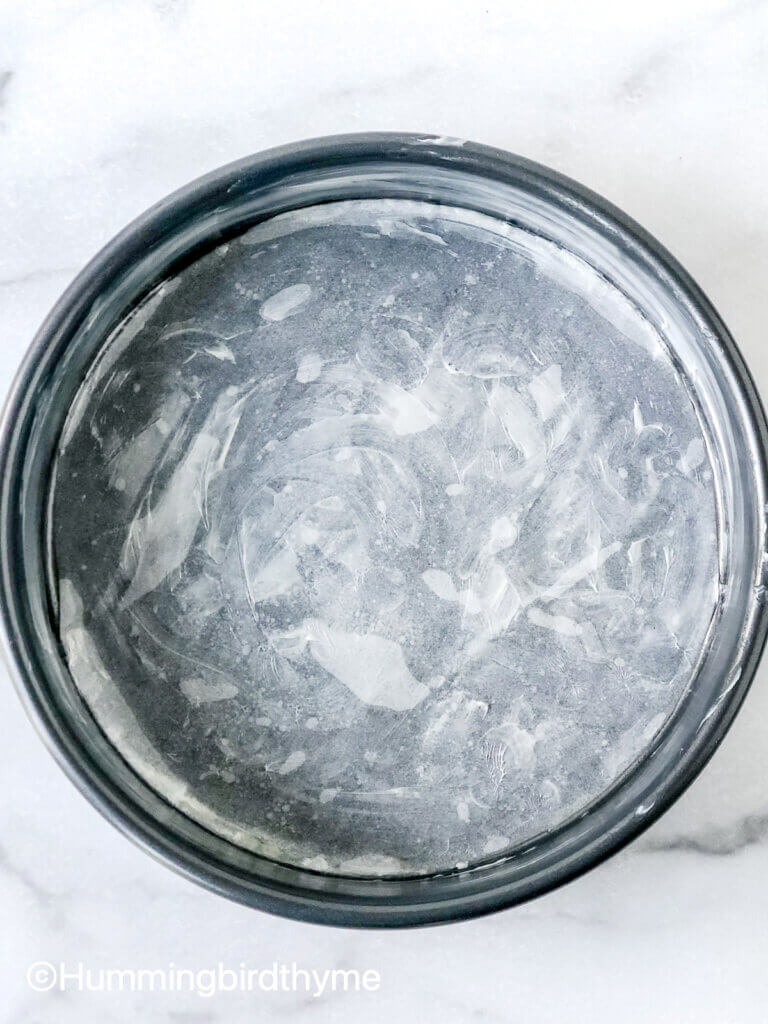
- Prepare your pan – It may seem like overkill, but you’ll be glad you did it all! Butter or spray the bottom of a 9″ round cake pan. Cut a parchment circle the exact size of the pan by tracing the bottom in pencil. Place it over the buttered bottom. Then, butter (or spray) the parchment bottom and sides of the pan.
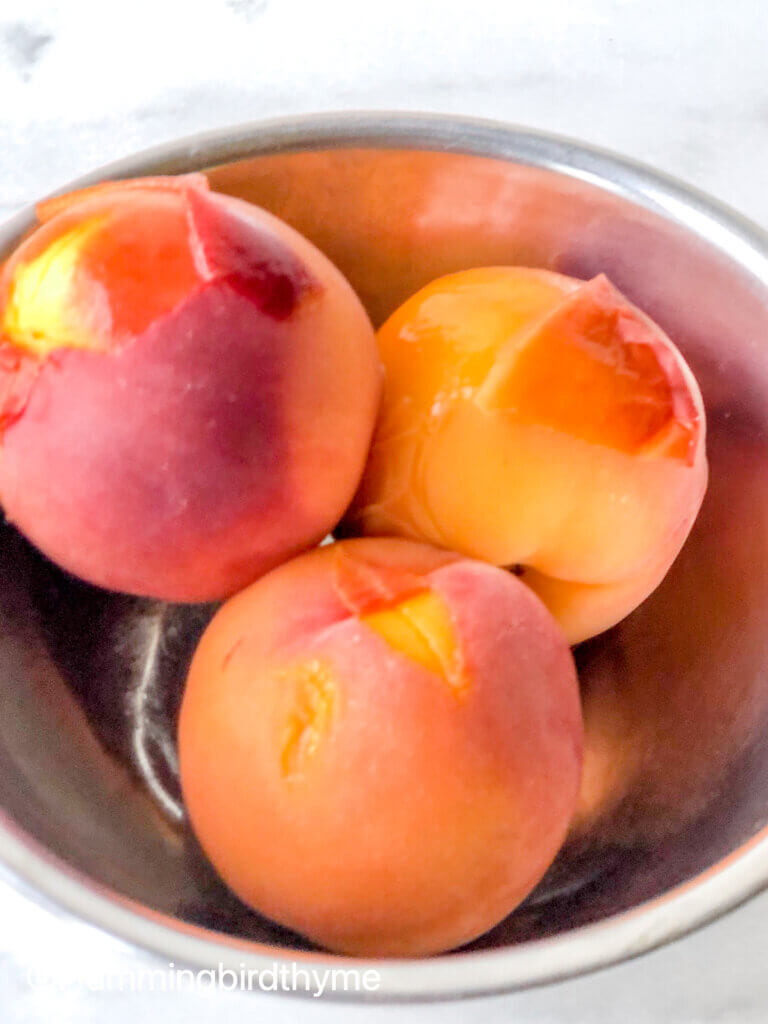
- Peel the Peaches – Ripe peaches are hard to peel. But if you take a sharp knife and score a large “X” into the skin at the bottom of the peach, and drop it into a pot of boiling water, and remove after 1 minute, the skin will loosen nicely. You’ll be able to easily pull the skin off with your fingers. Cut the peach in half, remove the pit, and slice each half into 8-12 thin slices.
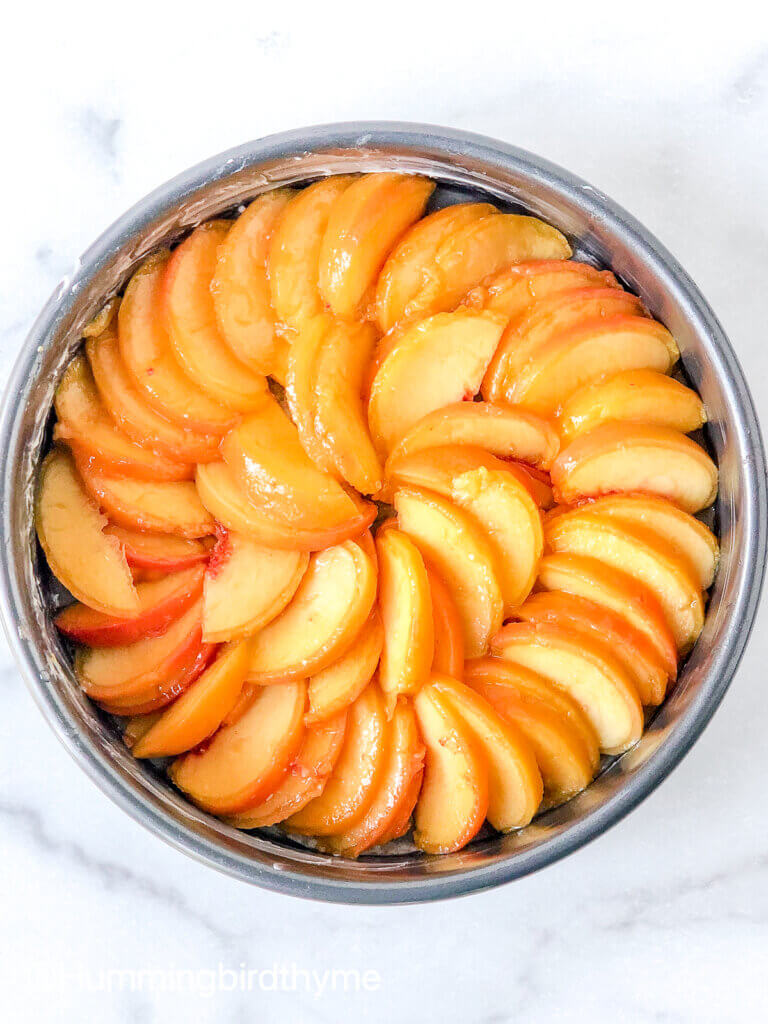
- Line the pan with peach slices – There’s no defined plan here, just dump or arrange the peach halves into the buttered, parchment-lines pan. If you have 3 Medium to Medium-Large peaches, they should all fit. Then, mix up the butter and brown sugar mixture and pour it over the peaches, and encouraging it to go to the bottom is perfect-it makes more caramelized bits! Set aside while you mix up the cake batter.
1. Mix dry ingredients 2. Mix beaten eggs with sour cream Add rest of wet ingredients Whisk Until smooth 3. Add wet to dry 4. Pour over peaches. Bake. Flip

Make the Batter and Bake the Cake
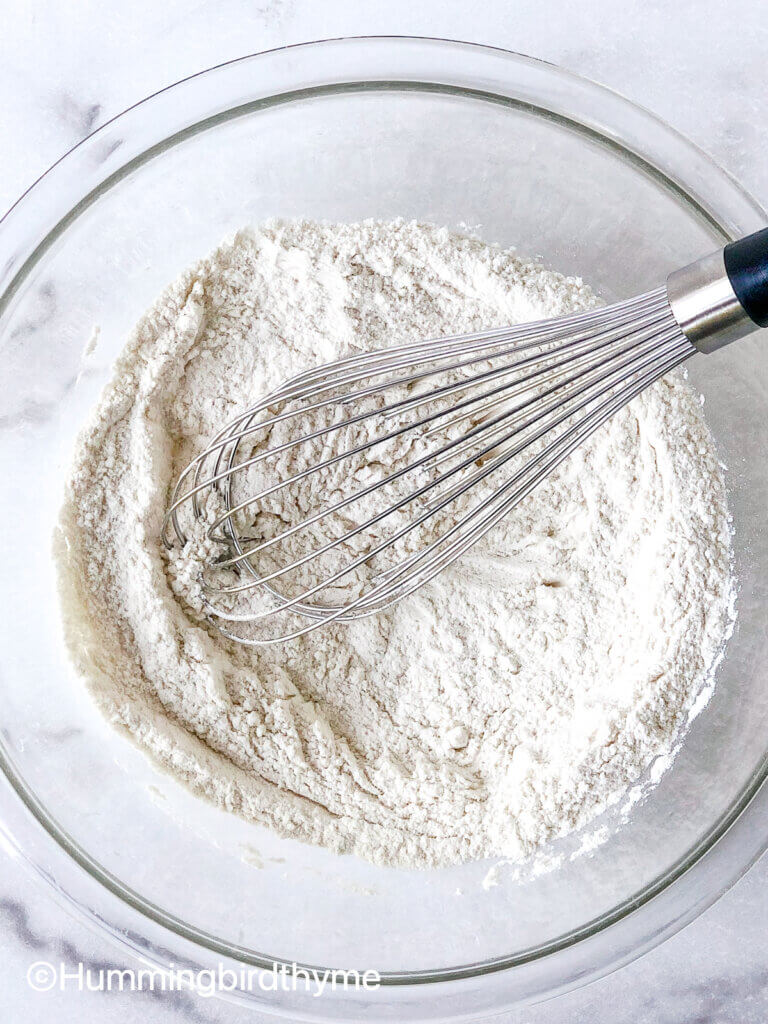
- Mix the Dry Ingredients – Just whisk the dry ingredients: flour, baking powder, baking soda, salt. Set aside.
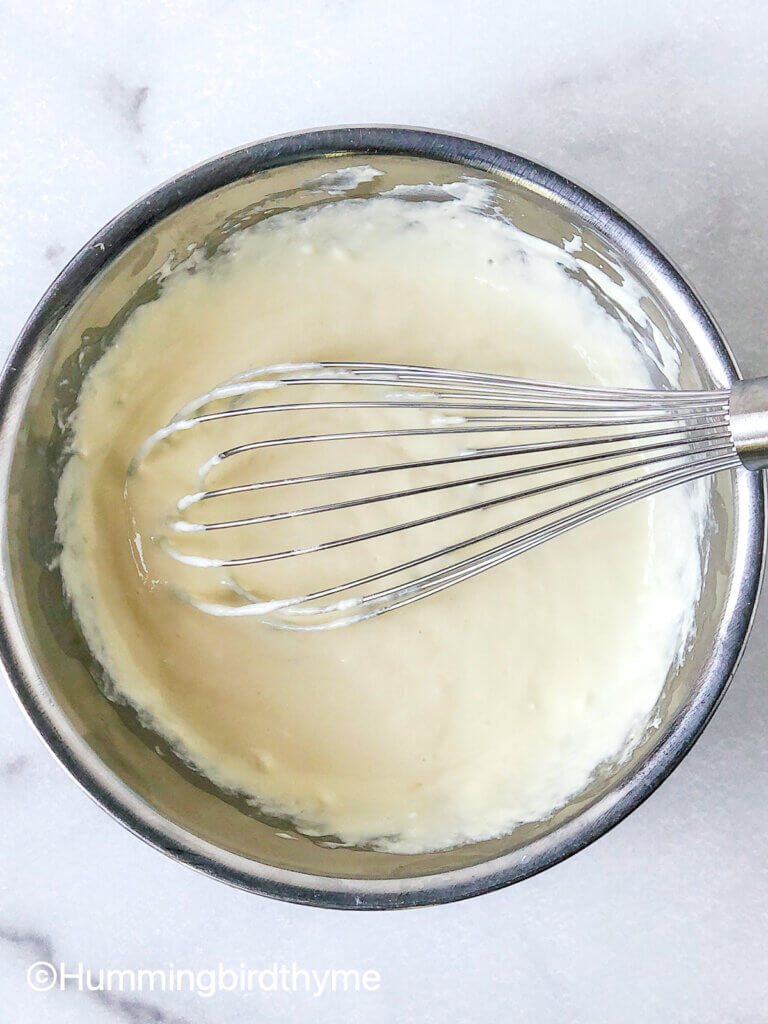
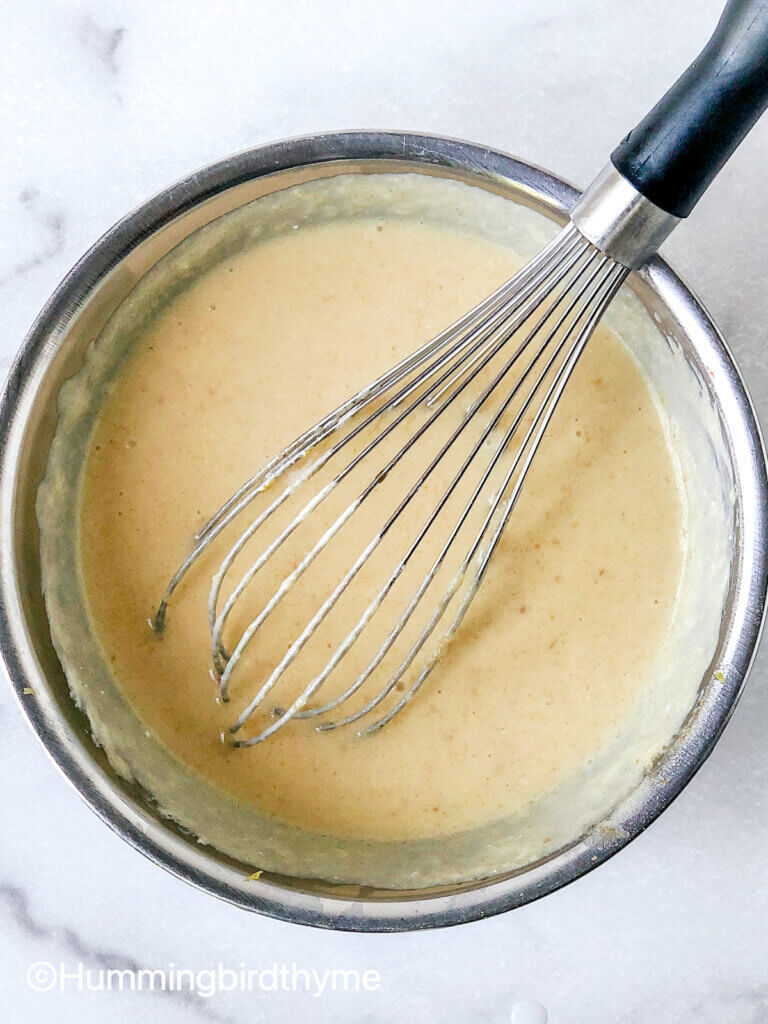
- Mix the Wet Ingredients – First whisk the eggs a bit, then add sour cream, whisk again. Then add the rest of the liquid ingredients. Again, whisk to combine. The mix should be smooth.
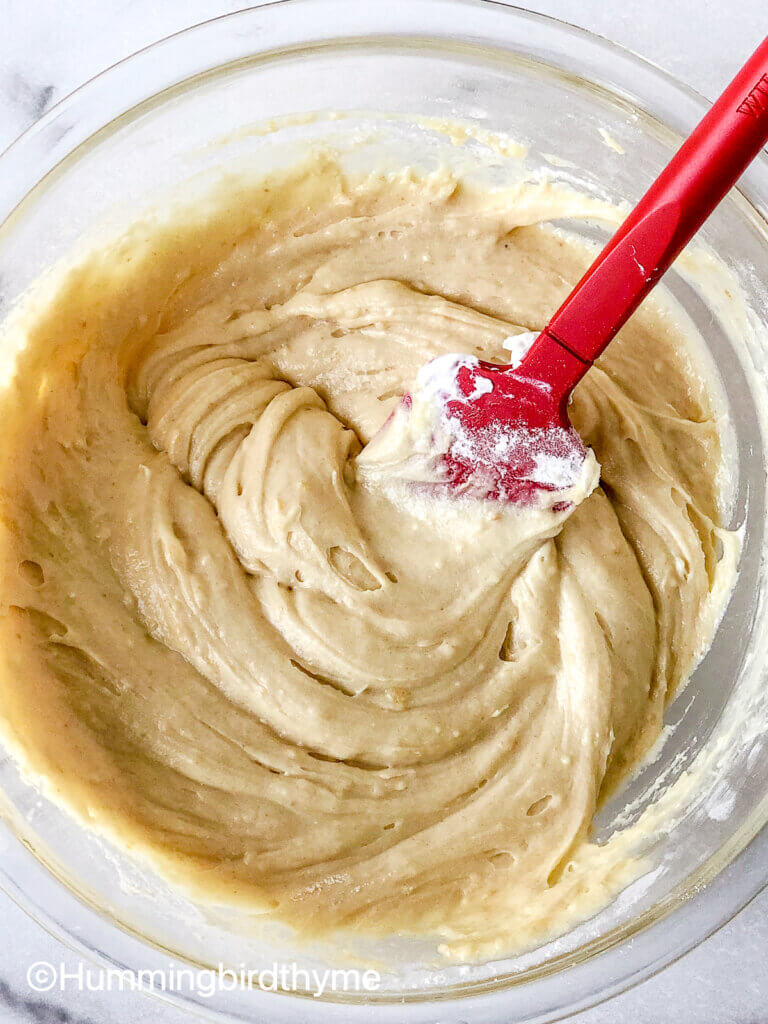
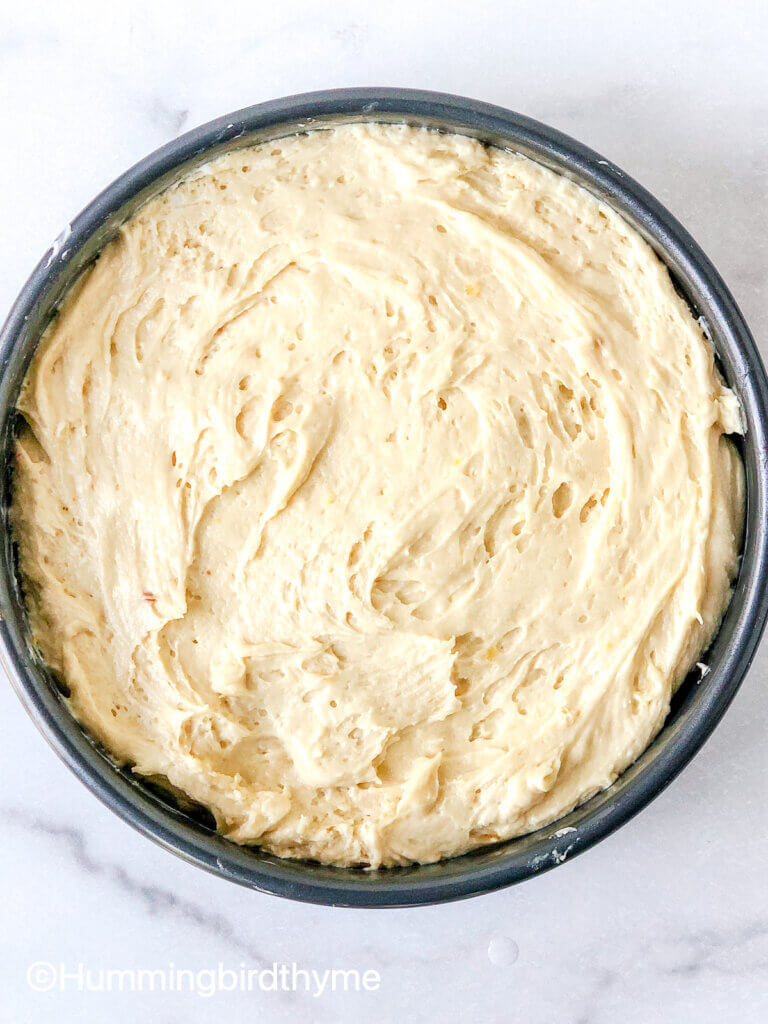
- Add the Wet to the Dry Ingredients – Pour the wet ingredients into the dry. Using a silicone spatula or spoon, mix just until combined, and mostly smooth.
- Pour the batter over Peaches – Smooth the top a bit.
- Bake – in the preheated oven, 38-44 mins ( mine took 41 mins). The cake should bounce back when touched and have begun pulling away from the pan’s sides, or register 190F when tested with a thermometer.
Want to Save this recipe for later? Pin Brown Butter Peach Upside Down Cake Recipe!

Brown Butter Peach Upside Down Cake

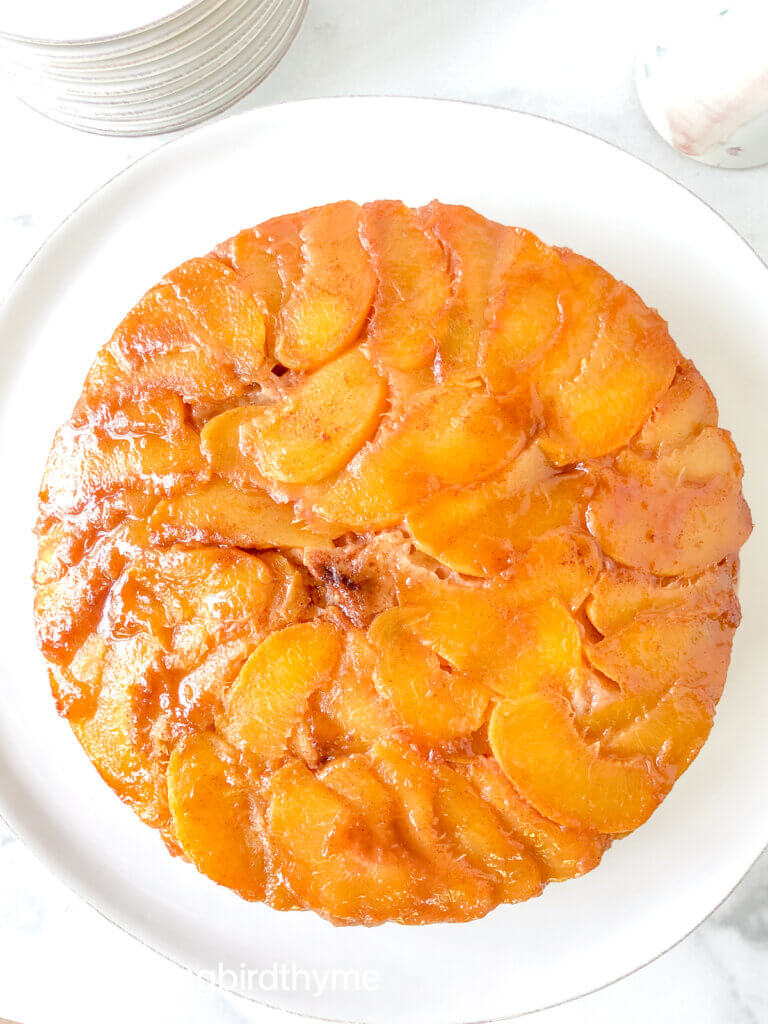
Fresh Peaches in a caramel-like glaze, resting atop a flavorful Vanilla Cake. Sour cream makes the cake super-moist, nicely dense and utterly scrumptious!
This cake is most delicious the day after you bake it. It’s awesome the day you bake it, but the day later – amazingly awesome! Best kept covered and eaten at room temperature, but refrigerate after a couple days, if it lasts that long!
- Prep Time: 45 min
- Cook Time: 45 min
- Total Time: 1 hour, 30 min plus cooling
- Yield: 8 servings 1x
- Category: Cakes
- Method: Baking
- Cuisine: International
Ingredients
For the Peach Layer
- 1.5 lb (700g) Fresh, Ripe Peaches – about 3 Medium-Large
- 3 Tbsp (43g) Butter
- 4 Tbsp (50g) Dark Brown Sugar
- 1/2 tsp Cinnamon
- 2 tsp Fresh-Squeezed Lemon Juice
- Big Pinch Kosher Salt
Dry Ingredients:
- 1.5 cups (185g) All-Purpose Flour
- 1 1/2 tsp Baking Powder
- 1/4 tsp Baking Soda
- 3/4 tsp Kosher Salt
Wet Ingredients:
- 2 Large Eggs, Room temp
- 1 cup (8 oz, 237g) Sour Cream, Room temp
- 3/4 cup (150g, 12 Tbsp) Granulated Sugar
- 1 tsp Vanilla Extract
- 4 oz. (114g, 1 stick) Butter
- Zest from 1 lemon
Topping:
- 1 cup (237g) Sour Cream
- 2–3 Tbsp Dark Brown Sugar
Instructions
- Preheat oven to 350F or 335F for Convection Oven.
- Make the Brown Butter. – In a small (1-2 qt) saucepan over Medium heat, melt 1 stick of butter, and continue to cook it, swirling or stirring regularly. It will begin to spatter, and then eventually foam. Give it around 5-7 minutes, watching the whole time, until the foam begins to brown. You’ll be able to see the butter turn golden, and once brown bits form and drop to the bottom of the pan, remove from heat. Pour immediately into a heatproof container, set aside, and let cool.
- Peel and Slice the Peaches. Begin by boiling water in a large saucepan. Once it’s boiling, use a knife to score an “X” into the bottom of each peach. Add the peaches to the water, and turn the heat to simmer for about 1 minute. Remove the peaches. At this point they will be easy to peel with your finger. Peel, slice in half, remove pits and slice the peaches into thin slices, about 8-10 per half.
- Prepare the Baking Pan. Spray the bottom of a 9″ Round Cake pan. Use the pan as a guide to draw a 9″ circle on a sheet of parchment, and cut out the circle. Place the circle in the sprayed pan, then butter or spray the parchment circle and the sides of the pan. If you don’t have parchment, just spray or butter the whole pan bottom and sides again.
- Next, line the prepared pan with the sliced peaches, in any design you like to completely cover the bottom. Melt the 3 Tbsp butter, add the Brown Sugar, Cinnamon, Lemon juice and salt. Mix well and pour or spread with a pastry brush over the peaches.
- Mix the Dry Ingredients – In a large bowl, whisk together the AP Flour, Baking Powder, Baking Soda, and Salt. Set aside.
- Mix the Wet Ingredients – In a medium bowl, whisk the eggs, then, whisk in the sour cream. Stir in the sugar, vanilla, cooled brown butter and lemon zest.
- Make the Batter. Add the wet ingredients into the dry ingredients and stir into a relatively smooth batter. Lumps should be very few and small, if any. Pour the batter over the peach layer in the cake pan.
- Bake. Bake 38-44 minutes until cake is golden on top, and bounces back when touched lightly, or registers 190F when probed with a thermometer. Mine took 41 minutes in Convection Oven.
- Invert over serving plate. After 15 minutes out of the oven, place your serving plate atop the warm cake. Using potholders or gloves, quickly flip the cake out of the pan and onto the plate. Replace any fruit bits that may have stuck to the parchment, back onto the cake. Cool completely before topping and Serving.
- Make the Topping. Stir the brown sugar into the sour cream. Top slices of cake, as desired.
Notes
- Keep leftover cake covered at room temperature up to 3 days, or in the refrigerator up to 5 days, but bring to room temperature before serving.
Nutrition
- Serving Size: 1/8 recipe
Keywords: Peach Upside Down Cake, recipe, Brown Butter, no mixer, easy upside down cake, easy cake recipe, peach cake, peaches and cream cake

I can’t stop buying peaches, Laura! And sometimes I am just eating a couple a day because they’ve gone too ripe, haha. This cake looks like a great use for them!! And its so pretty 🙂
★★★★★
Thanks, Katherine! Peaches are indeed one of the best tastes of summer, aren’t they!
What a delicious looking cake, Laura! Anything with brown butter…. yes please!
★★★★★
Thanks so much, Michelle! Im totally on the brown butter train!
I have honestly never in my life made brown butter, Laura, because it just seems like that one step too far for me – but based on your recommendation, I would actually go into that extra effort just to see what this cake tastes like; it sounds (and looks) absolutely divine. And peaches are definitely one of my favourite summer fruits – I am not sure I could wait till the second day to taste this!
★★★★★
Thanks so much, Katerina! I totally get being unable to wait for 2nd day! We tested both day 1 cake and day 2 cake, Day 2 was rated better by 100% of testers (only 3 of us😉), hopefully you’ll be able to test your own!
Not only is that a stunning looking cake Laura, but I just know it would taste delicious! I’m just worried it won’t make it to the next day. As soon as Lynne sees this in the kitchen I doubt it would last! Ha ha!
★★★★★
I get that, Neil! We did have a slice day 1, but the difference in both flavor and texture day 2 was enough for us to swear off a first-day cake next time! Hope you get the chance to test your own day1 vs day2 cake!
Wow ! Until now, I tried apple and banana version but this one is sooooo into the season and looks so gooood !
★★★★★
Thanks so much, Davorka! I, too, love any upside-down cake, and you’re so right, peaches are a great choice this time of year, but this cake recipe wiil work for just about any fruit!
Yes please, love peaches and all other stone fruits. The cake looks fabulous. Lush with summer flavor and gorgeous too!
Thanks so much, Balvinder! I agree, any stone fruits would be fantastic in this recipe! I can’t get enough of them either!
This cake looks and sounds terrific, Laura! Who doesn’t love some succulent peaches? That’s why I’m rarely able to cook with them (Too sluggish haha). And I definitely won’t be able to wait until the next day. Indeed, I wouldn’t surprise if I can’t resist and start eating the cake while stile warm and gooey haha.
★★★★★
I totally get that, Ben! It is definitely tasty warm on the first day, but I just wanted everyone to know, 2nd-day cake is almost always better! And, you’re so right, there’s absolutely nothing like a fresh, ripe, juicy peach!
Just saw this on IG and had to pop over and check it out Laura! It looks crazy good! I can’t wait to grab some summer peaches and get baking! Thanks for the recipe!
★★★★★
Thanks so much, MaryAnn! Fresh peaches are totally amazing, aren’t they? So many recipes. Im glad you like this cake and hope you get the chance to try it out!
What a fun recipe! It’s almost like a peaches n’ cream cake. We’ve been loving our peaches here this year, and any excuse to bake with peaches sounds good to me. Plus, the brown butter twist on this cake is a great touch! I’m impressed you convinced your family to hold off and save some of this cake for Day #2. Haha!
★★★★★
Fortunately there are only 3 of us at home now, so that made it easier. And, the photos from Day 2 showed an improved texture, too, so now I have actual data to support this next time! Ha! And, I agree, it is very nearly a Peaches ‘n’ Cream cake. I almost named it that, incidentally!